Coffee Forums banner

Gaggia Classic hose replacement and cleaning advice

1 reading
10K views 5 replies 3 participants last post by  El carajillo  
#1 ·
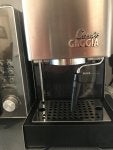
I am a bit excited after purchasing my first coffee machine tonight, a Gaggia Classic and I am pretty certain it is one of the pre 2015 models.

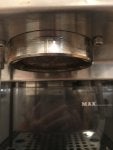
I would like to replace the clear plastic water tubing and give it a good clean up. Please could someone advise on where is best to buy the tubing? Also is there a best practice way to clean the underneath part? Can it be removed for cleaning? I will give it a good de-scale too.

Oh and I need to replace the plastic part of the steam wand. There is a small broken bit on it where it attaches to the pipe . Could somebody advise on what is the best part to replace the plastic bit with?

Thank you


Attachments

#2 ·
Think I picked up a meter of 5mm inner/8mm outer food grade silicon hose from ebay when I replaced mine a couple of yeara ago. The markup from buying it listed for the machine & cut down to size is extortionate!
The Espresso Shop do a good service kit with everything you need including thermostats (they can degrade over time shutting off at a lower temperature) which a few cheaper sets available on the net don't have (they're not needed if fitting a PID). You may as well strip it while you're replacing the pipes & YouTube has some good vids to follow. Most people replace the steam wand for a Rancilio Silvia one. The V1/2 is near enough a straight swap (especially if you get a pre-modified one with a gaggia nut on) though the v3 onwards is better & there are kits available but it's alot more intensive to fit.
 
#4 ·
It is the shower screen, you will need a 'phillips' screwdriver to undo the centre screw, they can be quite tight.

When you have removed the screen I would advise you to remove the "dispersion block", the aluminium block that the screen screws to.

You will need an allen key to undo the two hex bolts to release it, it may be stuck but it is only the gooey gunk holding it.

Thoroughly scrub both items and clean behind the dispersion block, then reverse procedure.

Many members change the aluminium block for a brass one which does not corrode to the same degree.
 
#6 ·
While you are at this stage it is easier to remove the group seal as without the dispersion block in place it gives better access to remove the seal.

Clean the seal and examine, check for hardness, cracks, and wear from the basket (showing as deep grooves in the face)

Also check that there are no old bits of seal in the groove where it fits. For the cost of them it is better to replace it now.